本例是在red hat 9下
php5.2.1
apache2.2.4
MySQL5.0.37
phpmyadmin2.10.0.2
ZendOptimizer-3.2.6
libxml2-2.6.11
的安装与配置
其中 libxml2-2.6.11 我下载在 /usr/ 目录下
其他都下载在 /usr/down 目录下.这些目录在下面安装过程中要用到
关于windows下的php环境配置可以参考 http://www.gimoo.net/article/8569.htm
安装前提
安装GCC
Linux与C天生有不解之缘,LINUX内核主要部分是用C写的,另外很多linux下的服务软件是用C写的,
如MSSQL,Apache是用C写的.如果没用安装gcc编译器这些软件根本安装不了
有以上类似信息说明已有GCC, 如果你没有,请先拿安装光盘装好它
Thread model: posix gcc version 3.2.3 20030502 (Red Hat Linux 3.2.3-34)
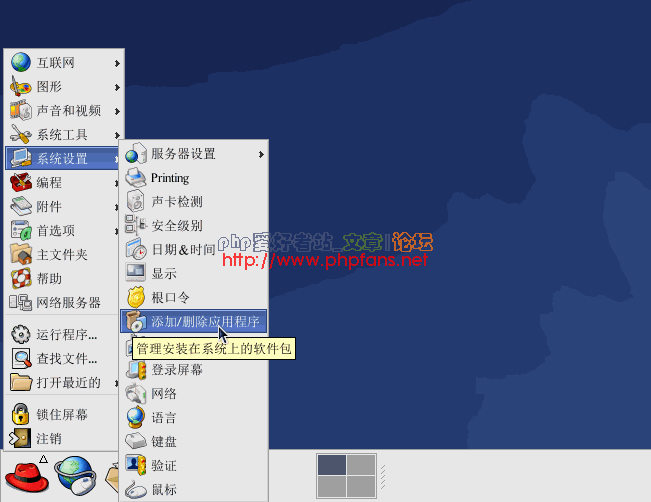
1. 点击 红帽菜单 > 系统设置 > 添加/删除应用程序 如图
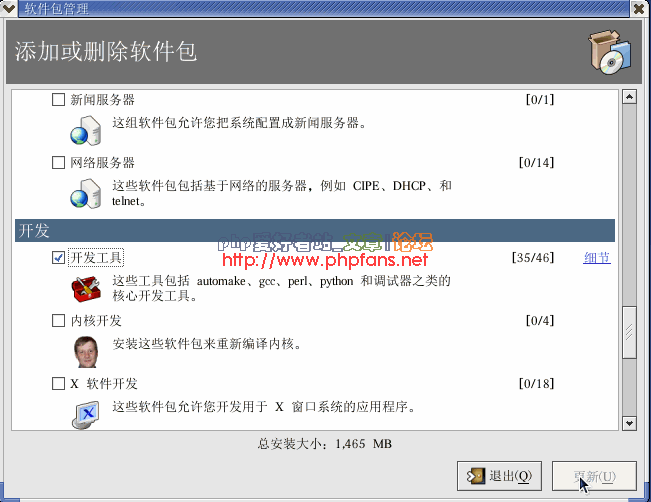
2. 如果gcc还没有安装的话,开发工具前面的勾是没有勾上的.勾上开发工具.点击右下角的 更新.如图
安装过程中会提示插入linux系统盘.插入系统盘完成安装
安装libxml2
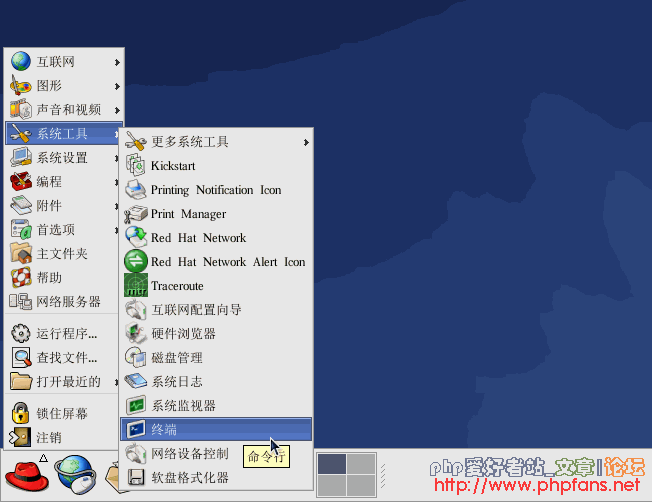
1.点击 红帽菜单 > 系统工具 > 终端
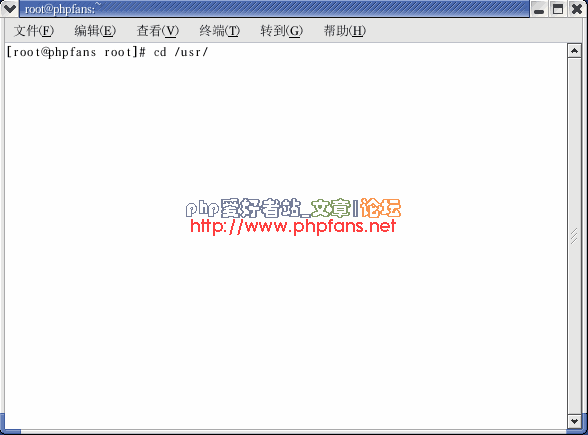
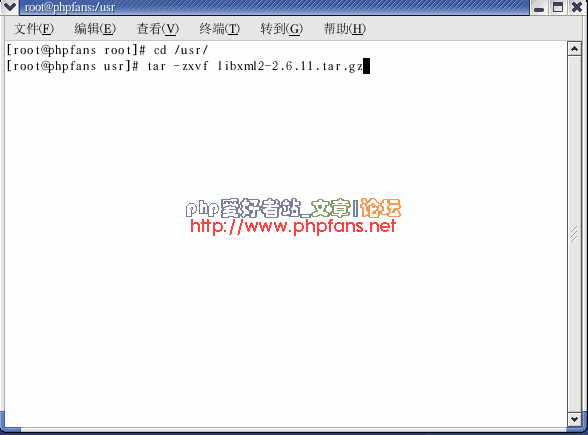
2. 输入命令 cd /usr/ 回车
进入libxml2源码所在目录
3. 执行 tar -zxvf libxml2-2.6.11.tar.gz
解压libxml2源码.如图
4. 系统自动列出各解压项.
小提示:解压完成后可以执行 clear 命令清屏
如图
5. 执行 cd libxml2-2.6.11
进入解压出来的目录.如图

6. 执行 ./configure
如图
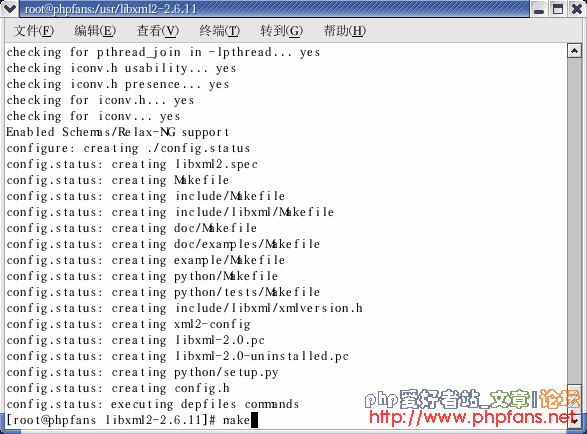
7. 执行 make
编译源码.如图
有些源码编译时要相当相当的时间.大家一定要耐心
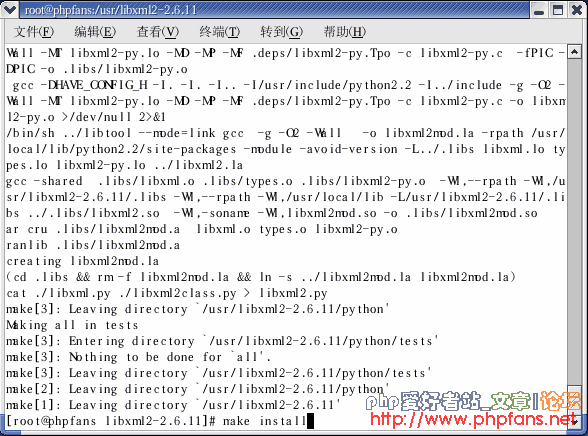
8. 执行 make install
安装libxml2.如图
更多文章 php爱好者站 http://www.phpfans.net
安装MySQL
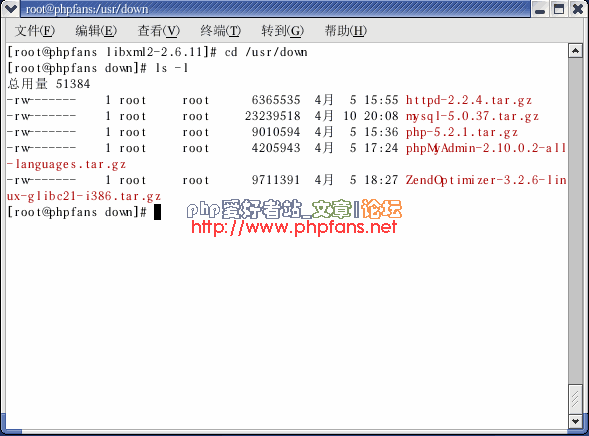
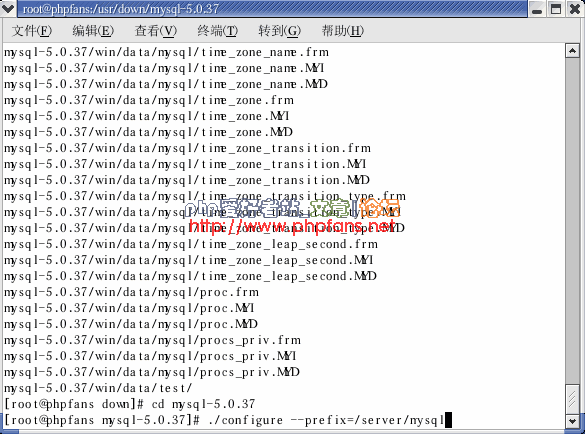
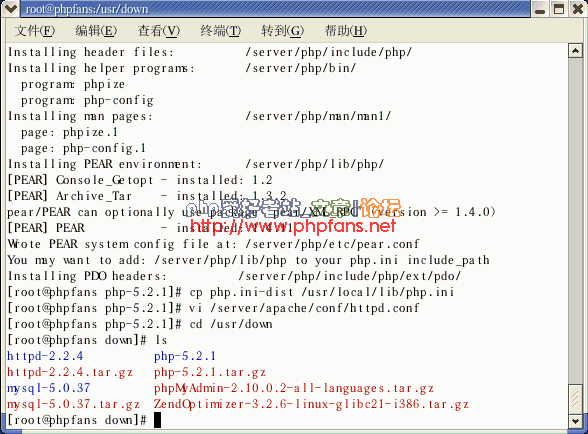
1. 执行 cd /usr/down
去到mysql源码所在目录.
执行 ls -l
可以列出当前目录的文件列表.如图
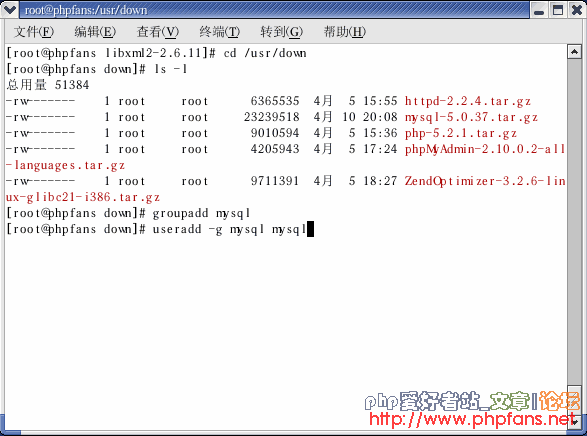
2. 执行 groupadd mysql
如图

3. 执行 useradd -g mysql mysql
如图
4. 执行 tar -zxvf mysql-5.0.37.tar.gz
解压mysql源码.如图

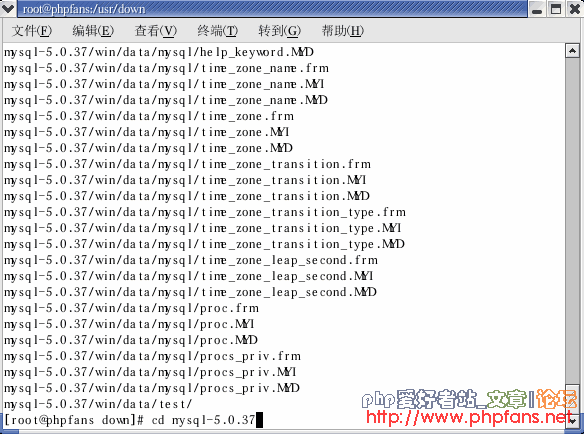
5. 执行 cd mysql-5.0.37
进入刚解压出来的目录.如图
6. 执行 ./configure --prefix=/server/mysql
其中 prefix 参数指明mysql安装目录.我们将它安装在/server/mysql目录下.如图
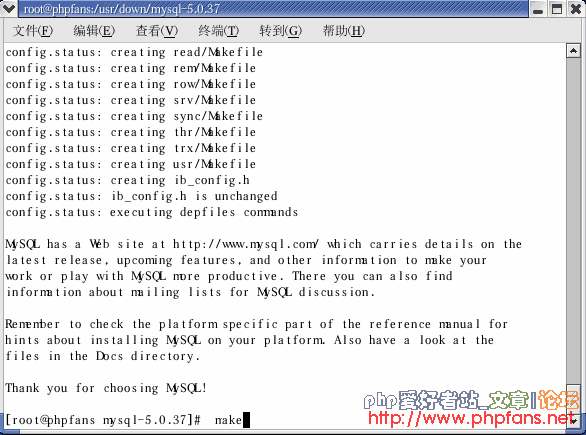
7. 执行 make
如图
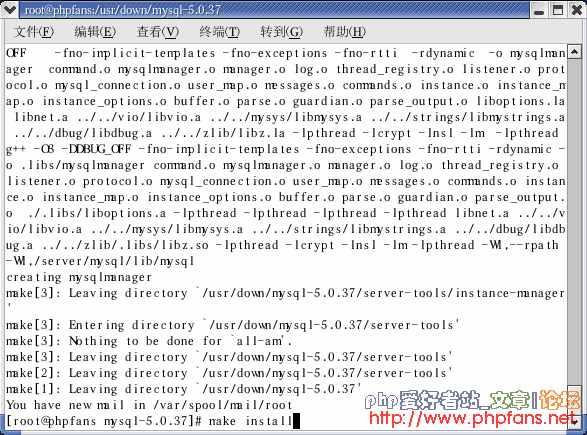
8. 执行 make install
如图
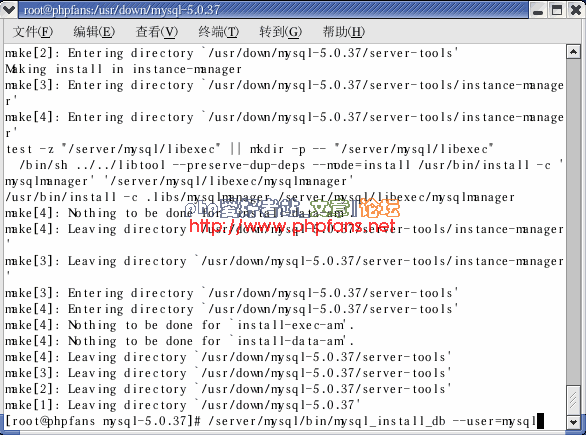
9. 执行 /server/mysql/bin/mysql_install_db --user=mysql
如图
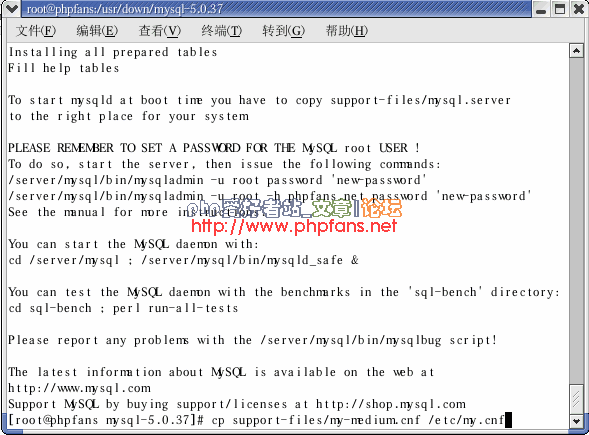
10. 执行 cp support-files/my-medium.cnf /etc/my.cnf
将mysql配置文档复制到/etc/目录下并保存为my.cnf
如图
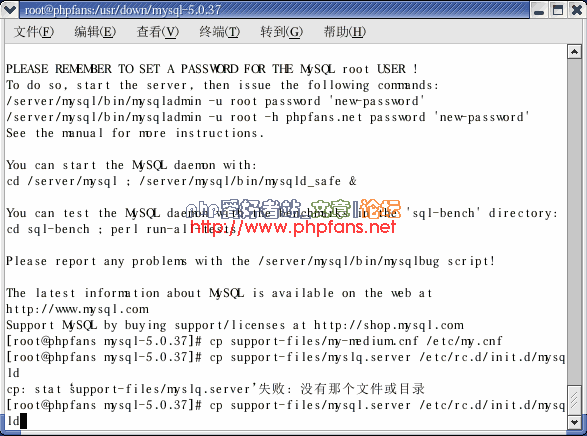
11. 执行 cp support-files/mysql.server /etc/rc.d/init.d/mysqld
如图
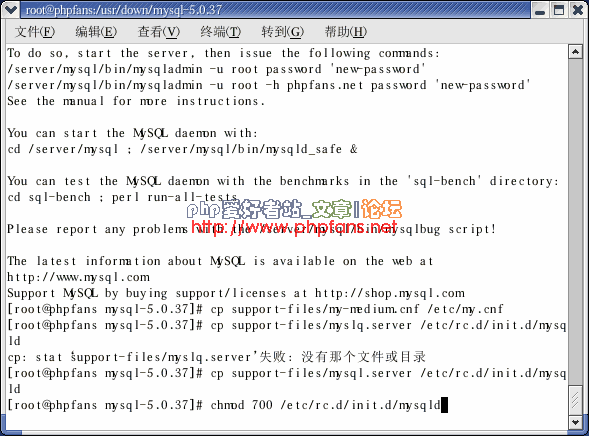
12. 执行 chmod 700 /etc/rc.d/init.d/mysqld
如图
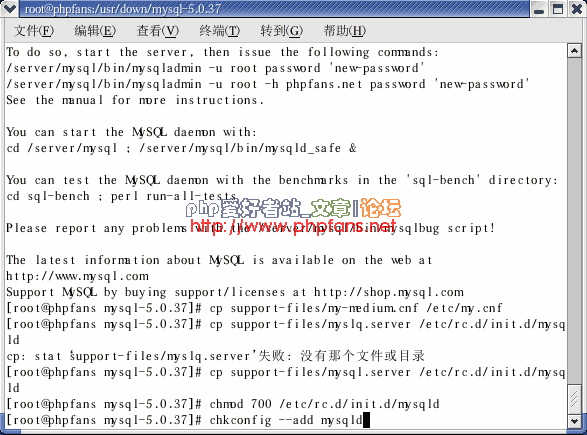
13. 执行 chkconfig --add mysqld
如图
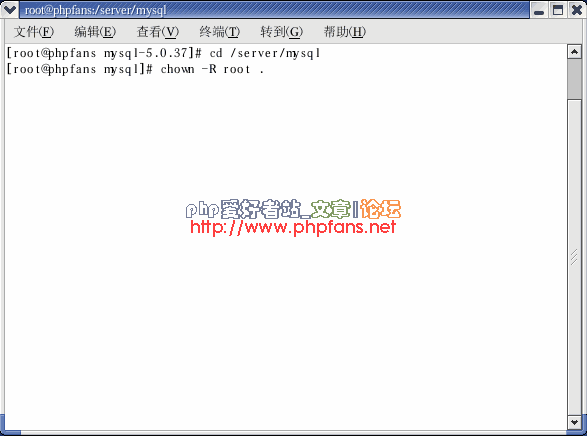
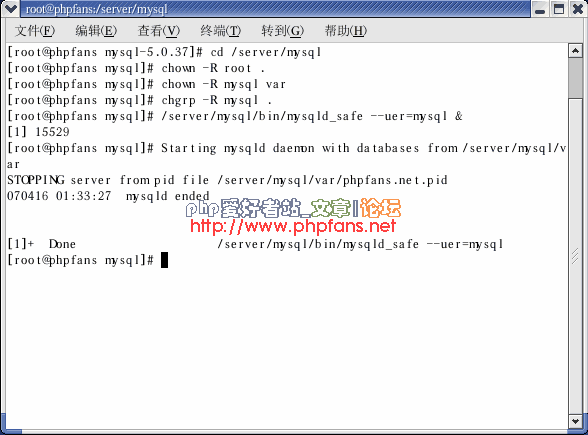
14. 执行 cd /server/mysql
进入mysql安装目录.
并执行 chown -R root .
注意:不要漏了后面的 ".".如图
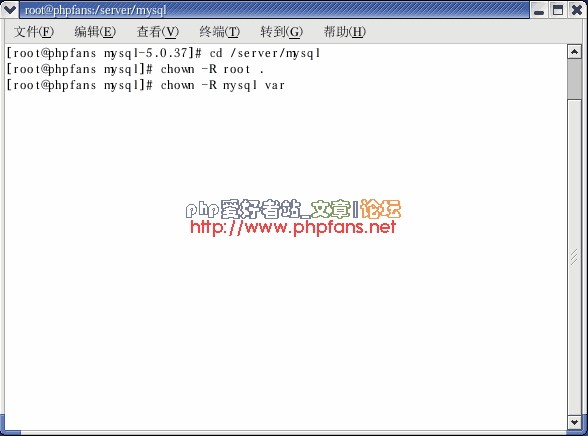
15. 执行 chown -R mysql var
如图
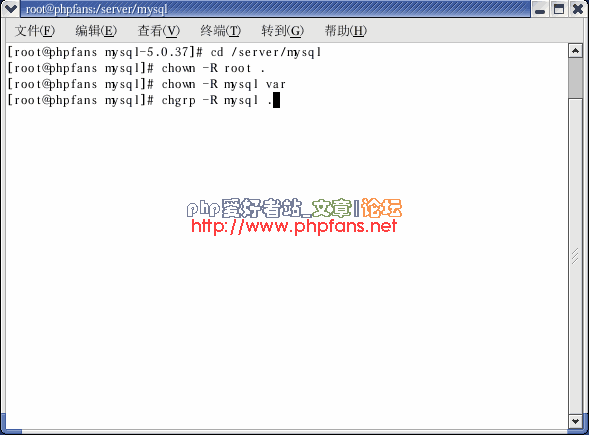
16. 执行 chgrp -R mysql .
不要漏掉".".如图
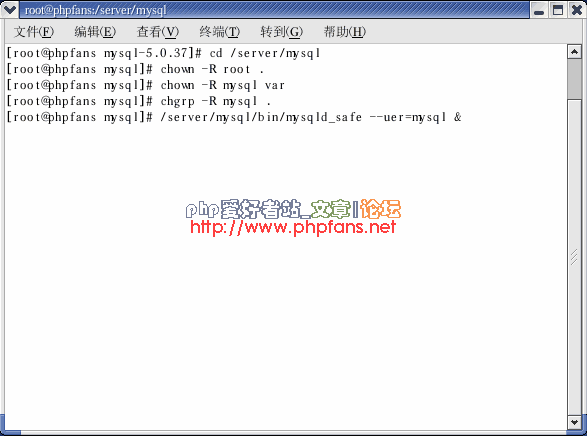
17. 执行 /server/mysql/bin/mysqld_safe --user=mysql &
启动mysql.如图
18. 在出现 mysqld ended 的时候.点击回车.回到命令行
如图
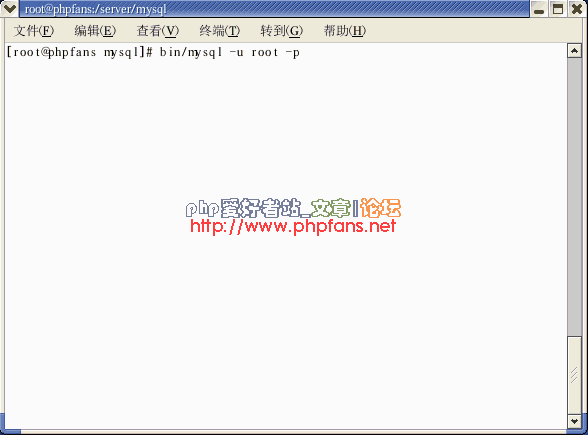
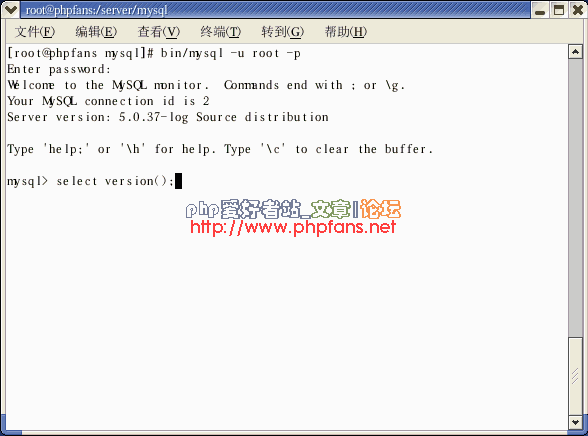
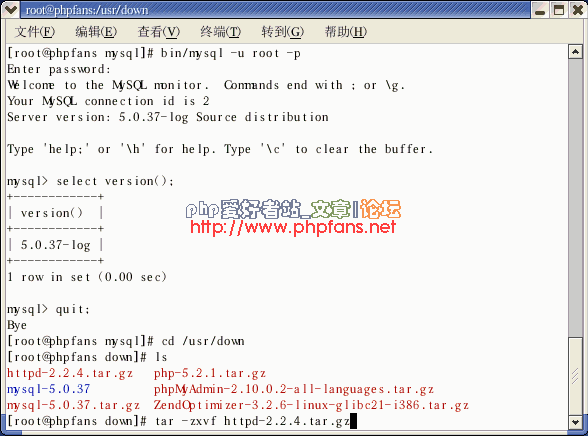
19. 执行 bin/mysql -u root -p
登陆mysql.如图
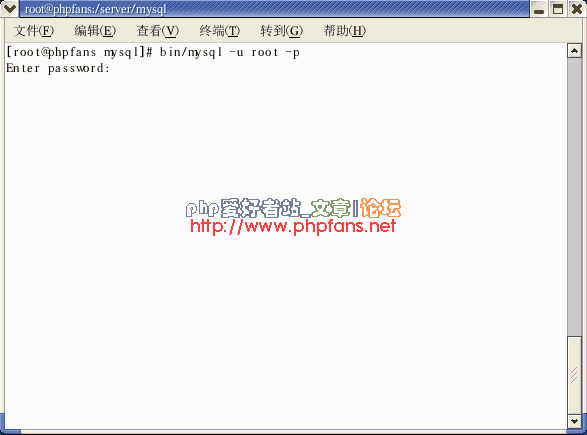
20. 系统会提示输入密码.由于我们安装时没有设置密码.所以默认密码为空.直接点击回车进入
如图
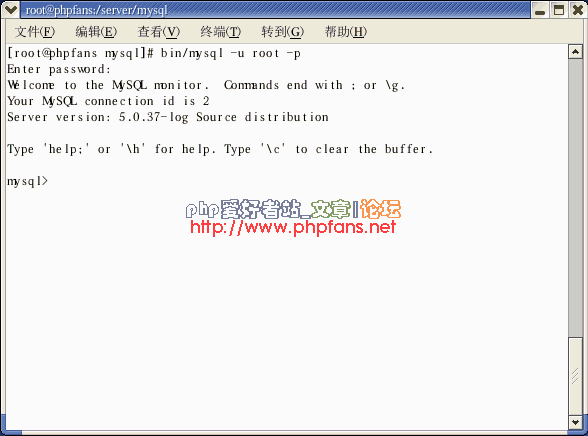
21. 出现如下界面则说明mysql安装好并可以使用了.
如图
22. 我们现在来测试一下mysql.
输入 selcet version();
查看mysql的版本
注意:sql语句要以";"结尾
更多文章 php爱好者站 http://www.phpfans.net
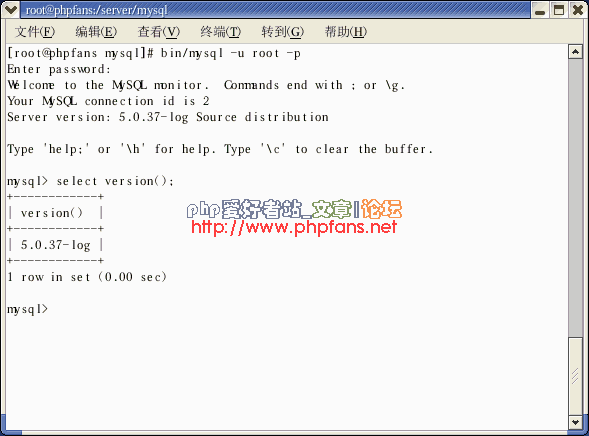
23. 可以看到,的确是我们刚装的 mysql-5.0.37
如图
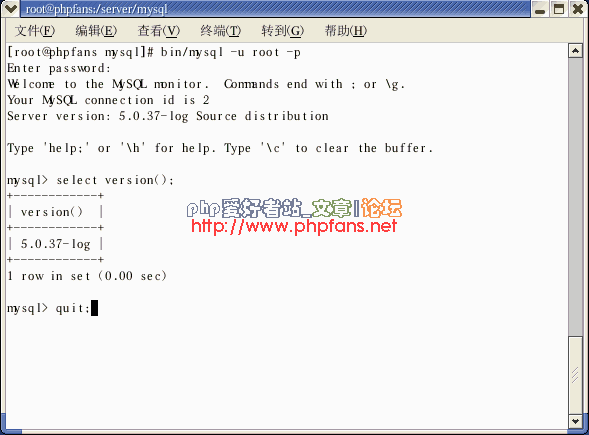
24. 执行 quit;
退出mysql命令行.
安装Apache
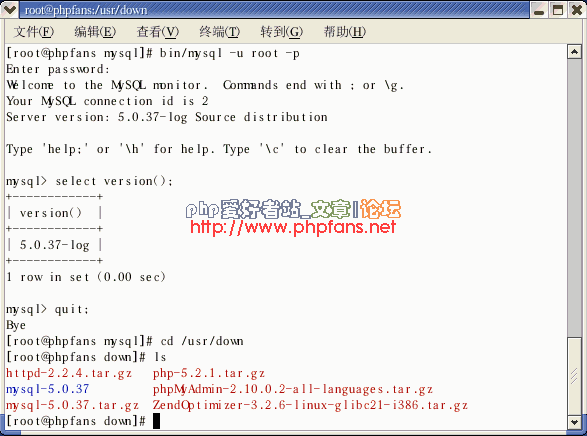
1. 执行 cd /usr/down
回到apache源码所在目录.如图
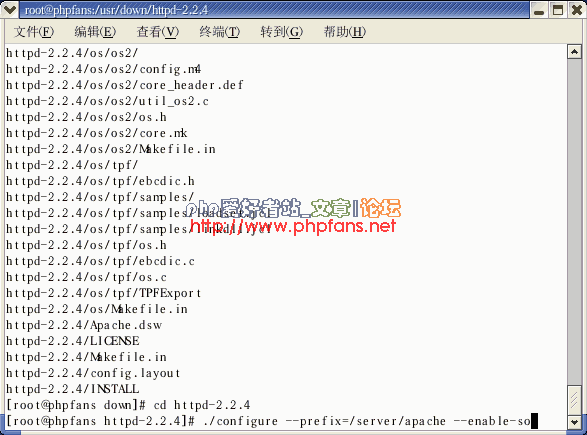
2. 执行 tar -zxvf httpd-2.2.4.tar.gz
如图
3. 执行 cd httpd-2.2.4
如图

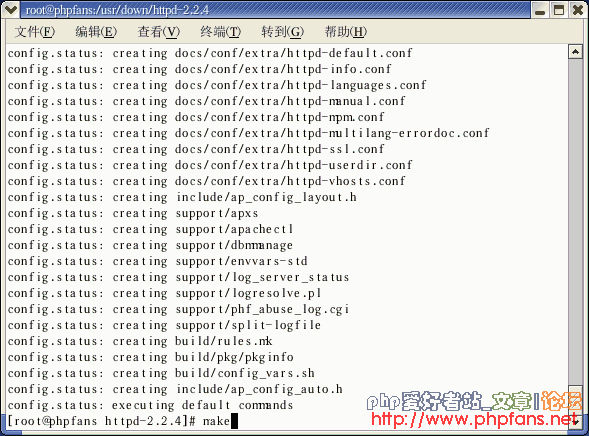
4. 执行 ./configure --prefix=/server/apache --enable-so
如图
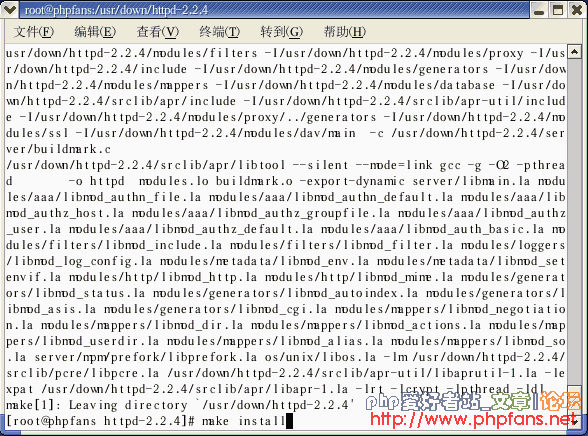
5. 执行 make
6. 执行 make install
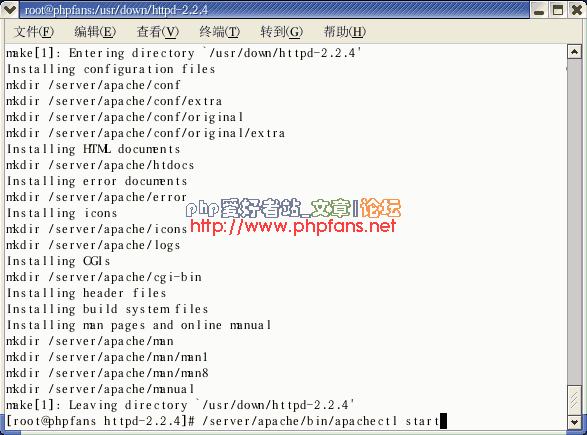
7. 执行 /server/apache/bin/apachectl start
启动apache.如图
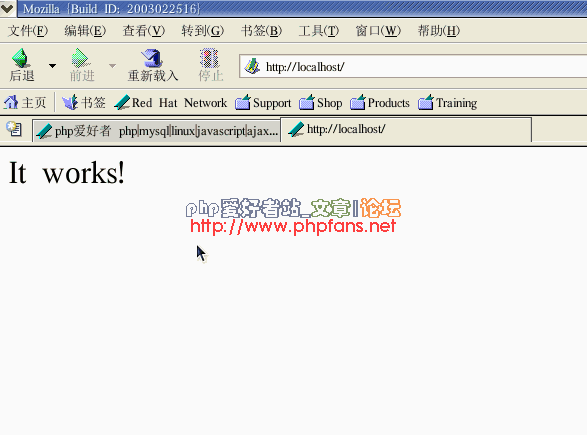
8. 在浏览器打开 http://localhost/ 或者 http://127.0.0.1
如果出现如下界面则说明apache已经安装好了
安装php
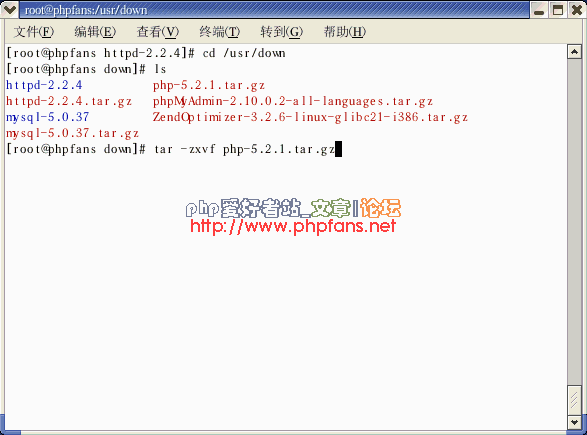
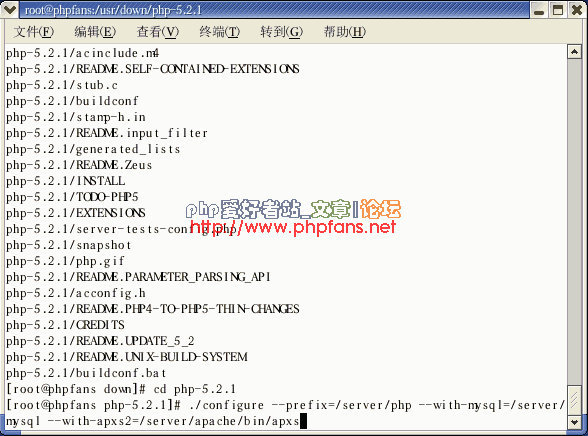
1. 执行 cd /usr/down
回到php源码所在目录.如图

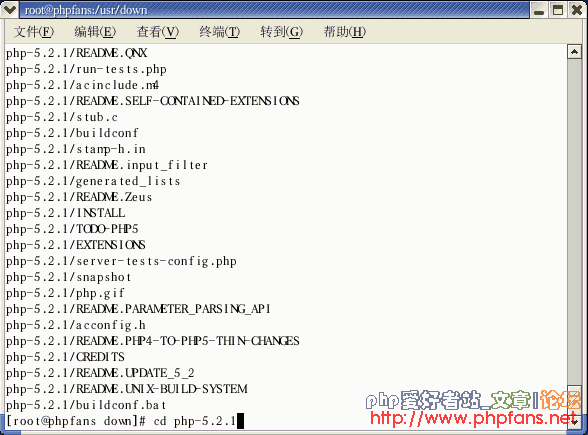
2. 执行 tar -zxvf php-5.2.1.tar.gz
如图
3. 执行 cd php-5.2.1
如图
4. 执行 ./configure --prefix=/server/php --with-mysql=/server/mysql --with-apxs2=/server/apache/bin/apxs
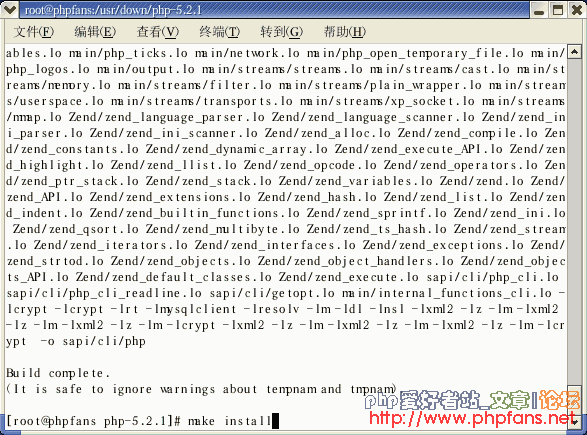
5. 执行 make
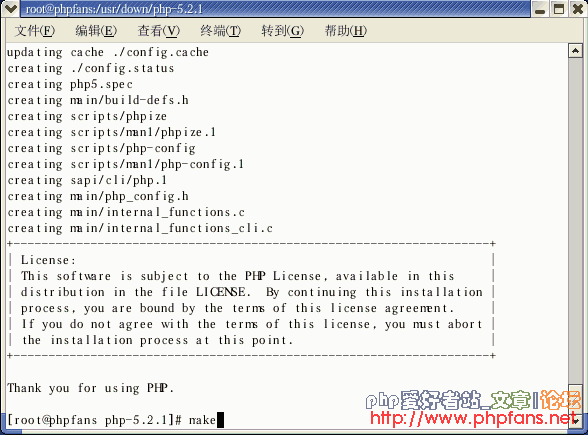
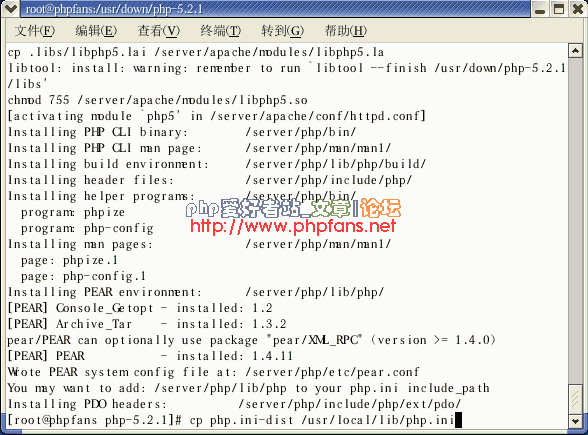
6. 执行 make install
7. 执行 cp php.ini-dist /usr/local/lib/php.ini
如图
更多文章 php爱好者站 http://www.phpfans.net
配置Apache关联php
本帖隐藏的内容需要回复才可以浏览
更多文章 php爱好者站 http://www.phpfans.net
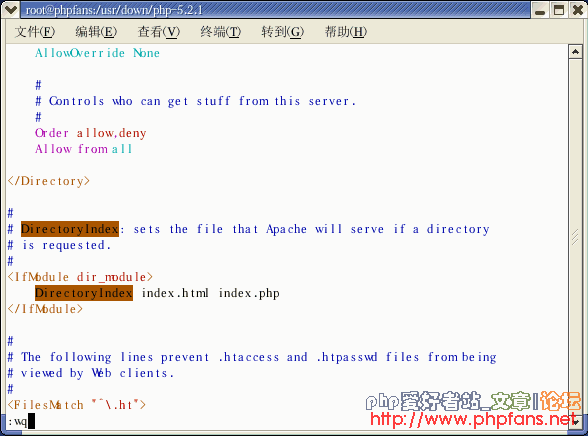
11. 点击 Esc 键.回到vi命令行方式.
输入 :wq 然后点击回车
其中 :wq 是存盘退出的命令
如图
安装ZendOptimizer
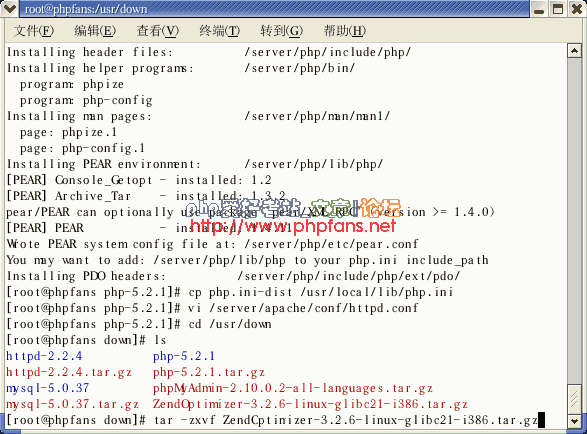
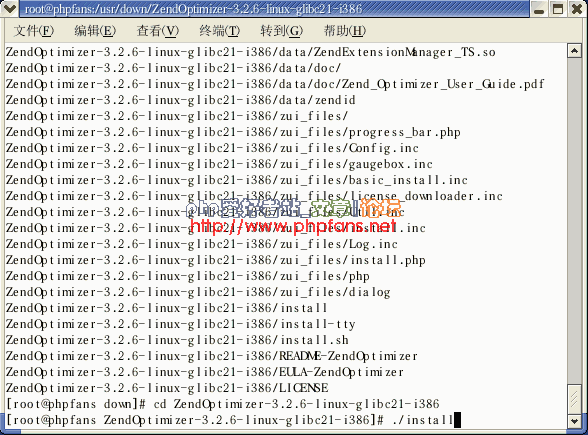
1. 执行 cd /usr/down
回到 ZendOptimizer 源码所在目录.如图
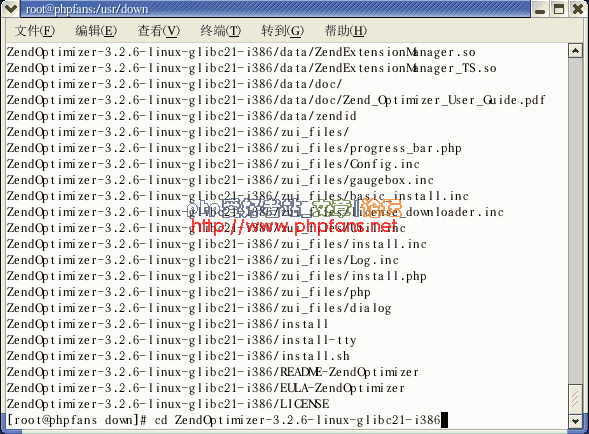
2. 执行 tar -zxvf ZendOptimizer-3.2.6-linux-glibc21-i386.tar.gz
如图
3. 执行 cd ZendOptimizer-3.2.6-linux-glibc21-i386
如图
4. 执行 ./install
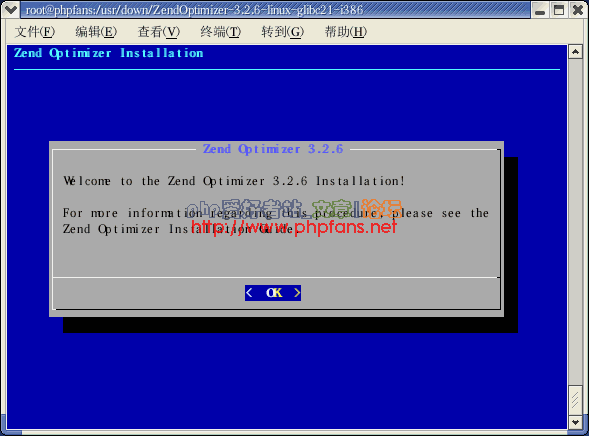
5. 进入如下的ZendOptimizer安装界面.点击回车
如图
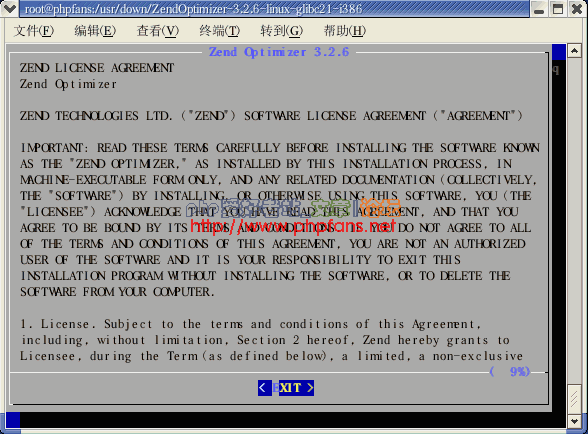
6. 点击回车
如图
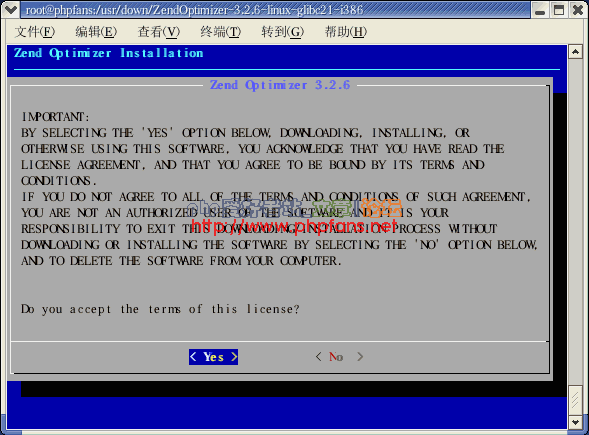
7. 在 Yes 上点击回车
8. 这里填写ZendOptimizer安装路径.我们将它安装在 /server/ZendOptimizer
下.填写 /server/ZendOptimizer 后点击 Tab 键.在 ok 上面点击回车
如图

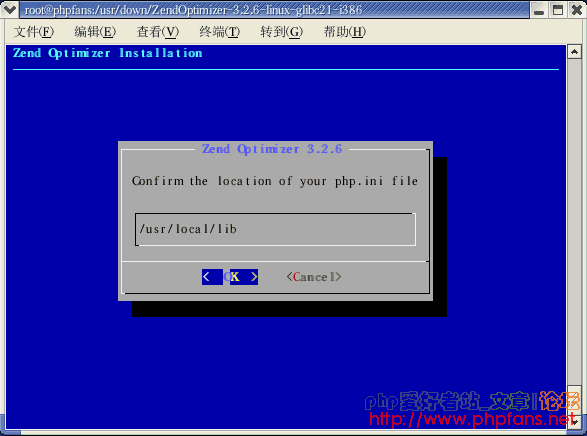
9. 这里选择php.ini所在位置.我们在之前的安装中已经将php.ini复制到了/usr/local/lib
下.所以这里不用修改.在 OK 上点击回车
更多文章 php爱好者站 http://www.phpfans.net
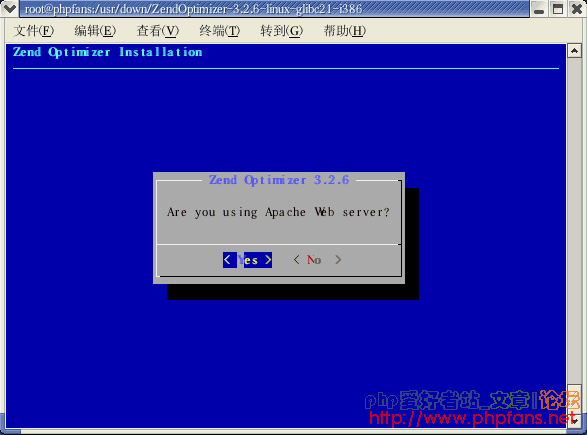
10. 我们用的正是apache.在Yes上点击回车
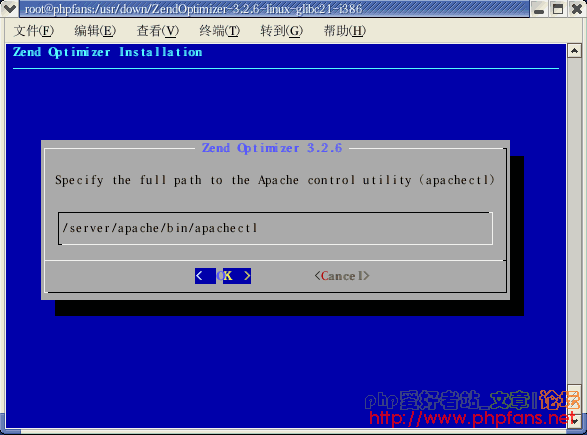
11. 这里填写apachectl的位置.我们的是在/server/apache/bin/apachectl
输入 /server/apache/bin/apachectl 后,点击 Tab 键移动光标到 OK 上.然后点击回车
如图
12. 点击回车
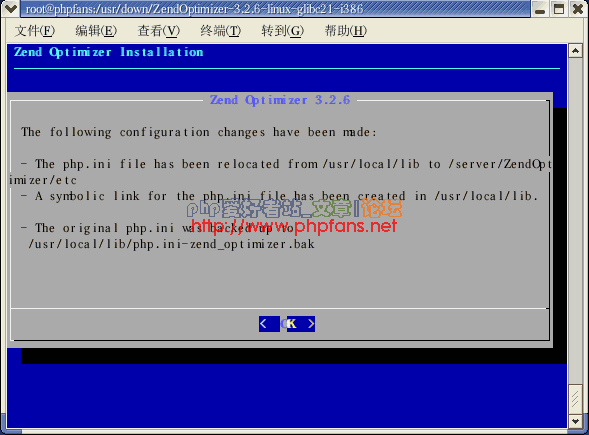
13. 点击回车
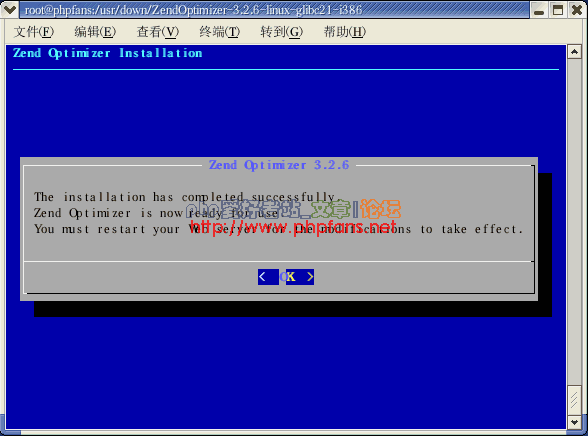
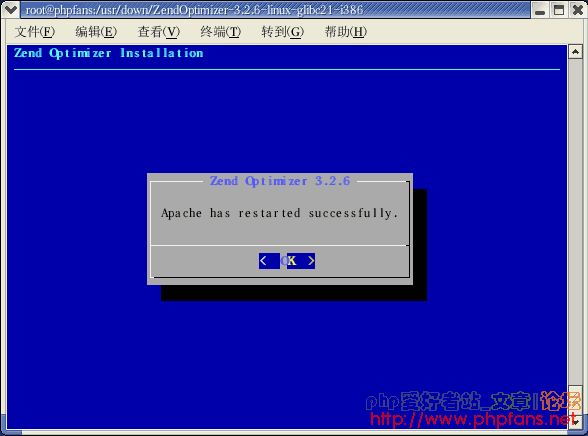
14. 点击回车 重启apache
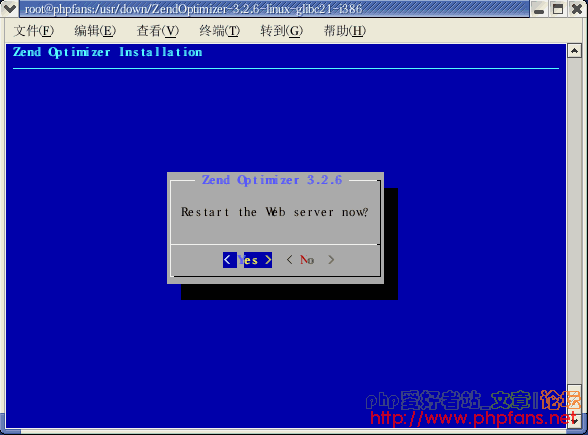
15. 点击回车 完成ZendOptimizer的安装
环境测试
安装完成后.我们来测试一下之前配置的环境是否正确
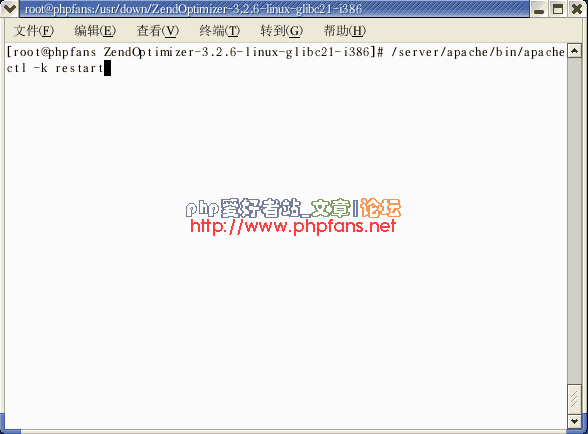
1. 再次重启apache.执行 /server/apache/bin/apachectl -k restart
尽管安装ZendOptimizer时已经重启了apache,但我们还是要执行如下命令重启apache
以确保apache修改的配置已经从新加载入来.请大家务必不要漏了这一步.
如图
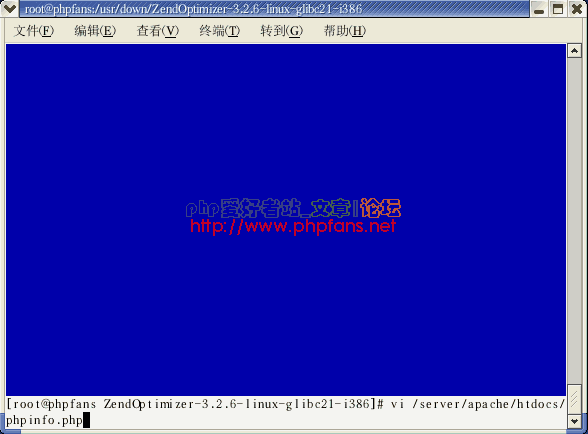
2. 执行 vi /server/apache/htdocs/phpinfo.php
在网站根目录下建立一个phpinfo.php的文件.如图
其中/server/apache/htdocs/是我们网站根目录.我们只要把网页放在这里边就行了
更多文章 php爱好者站 http://www.phpfans.net
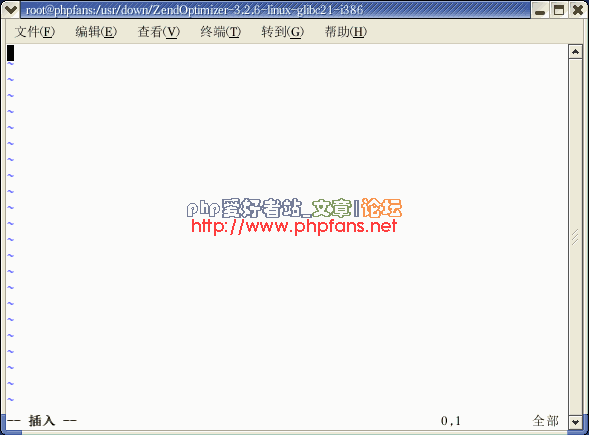
3. 点击 i 键进入 插入编辑方式.如图
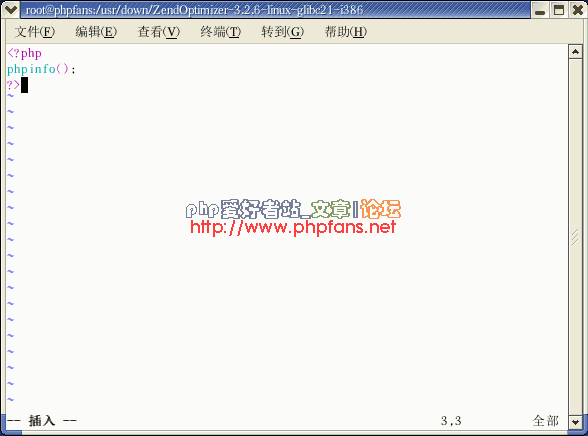
4. 输入
<?php
phpinfo();
?>
如图
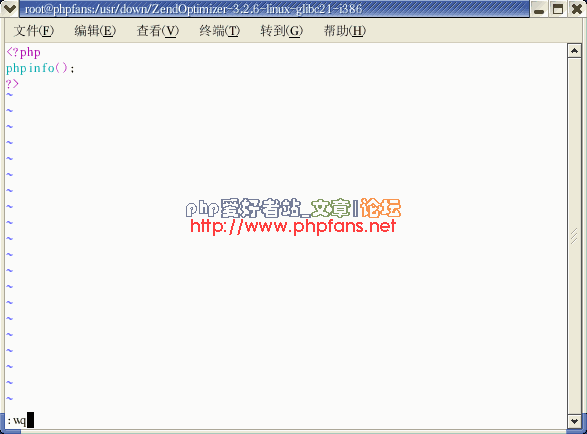
5. 点击 Esc 键回到vi 命令行方式.输入 :wq 回车
系统将保存phpinfo.php文件,并退出vi编辑器
如图
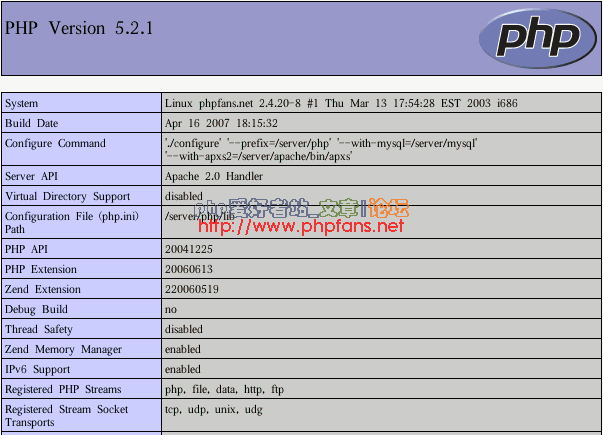
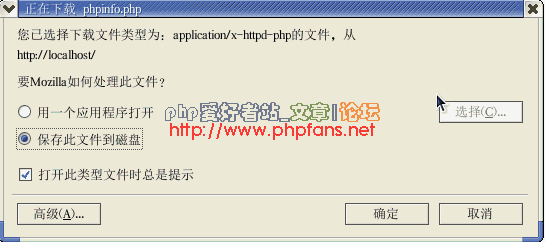
6. 在浏览器打开 http://localhost/phpinfo.php
如果出现如下界面则说明php已经安装好了.如果出现的是一个下载对话框,请往下看,有解决办法
如果出现的是这个界面.请确认做了环境测试的第一步:执行 /server/apache/bin/apachectl -k restart.
如果还是不行,建议重新启动一次linux.再执行 /server/apache/bin/apachectl start 启动apache.应该就行了.
7. 测试 php 是否和 mysql 关联.
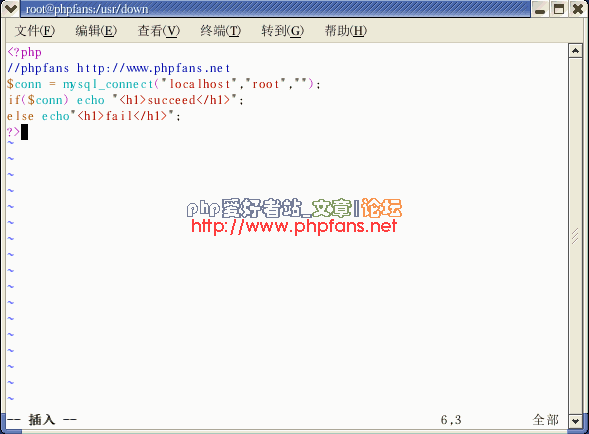
执行 vi /server/apache/htdocs/test.php
这一步忘了截图.大家执行了就行了
8. 点击 i 键进入 插入编辑方式.并输入
<?php
//phpfans http://www.phpfans.net
$conn = mysql_connect("localhost","root","");
if($conn) echo "<h1>succeed</h1>";
else echo "<h1>fail</h1>":
?>
如图
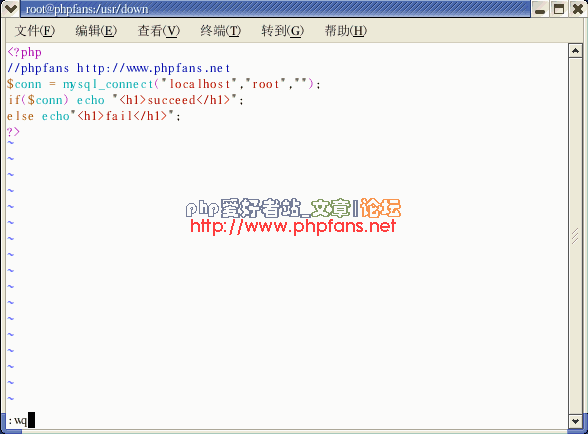
9. 点击 Esc 键回到vi 命令行方式.并输入 :wq 然后点击回车
如图
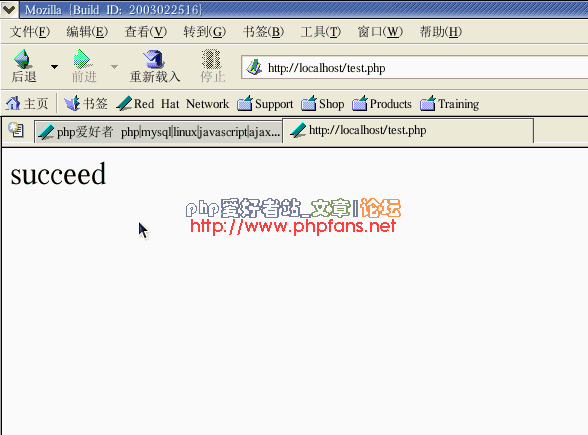
10. 在浏览器中打开 http://localhost/test.php
出现如下界面则说明php已经成功关联mysql了
安装phpMyAdmin
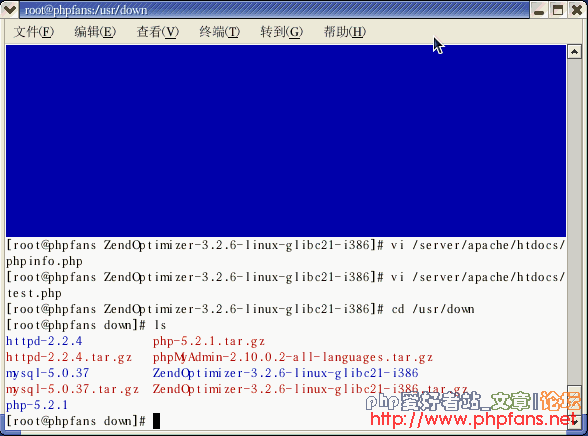
1. 执行 cd /usr/down
回到phpmyadmin源码所在目录.如图
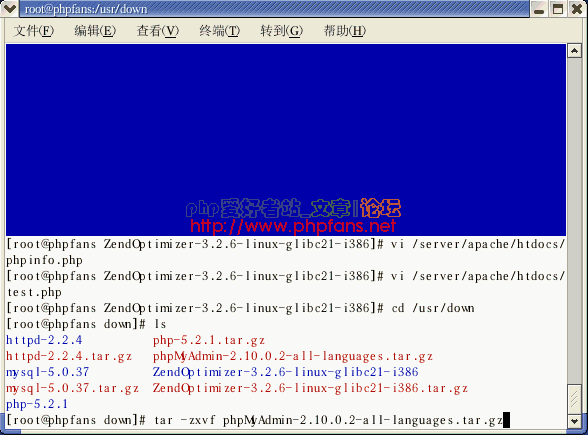
2. 执行 tar -zxvf phpMyAdmin-2.10.0.2-all-languages.tar.gz
解压phpmyadmin.如图
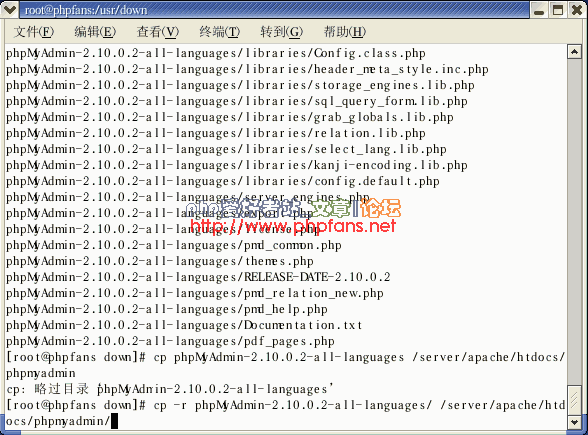
3. 执行 cp -r phpMyAdmin-2.10.0.2-all-languages/ /server/apache/htdocs/phpmyadmin/
将phpmyadmin剪切到网站根目录下.如图
4. 在浏览器中打开 http://localhost/phpmyadmin/
出现如下界面则说明phpmyadmin安装成了

phpMyAdmin 的具体功能,请慢慢熟悉,这里不再赘述.
-----正文到此结束-----


发表评论 取消回复